

Making Merchandise: Silk Screen Printing for a Tote Bag
- omygraphics
- Nov 9, 2021
- 4 min read
The second portion of our merchandise sub-project is creating a tote bag with our own designs using silk-screen printing.
To begin with, I carried out some artist research on artist and printmaker Nick Rhodes.
Artist Research: Nick Rhodes
Nick Rhodes is a graphic designer, printmaker illustrator and teacher based in Preston, England, who, in 2004, established Switchopen, a freelance illustration and graphic design company. In his work, Rhodes frequently uses the bitmap technique, using dots to add detail, create depth, shadow and highlights. Among other works, Rhodes has been commissioned by many famous musicians for gig posters and merchandise, one being Richard Hawley, an English singer-songwriter and former member of the Britpop band Pulp.
Sources:
An Introduction to Silk Screen Printing
We began by being introduced to silk screen printing. From newsprint paper, we designed our own stencils to use to print with.
We followed the screen printing process as follows:
Create and cut our stencil
Place two pieces of paper, the silk screen frame, and our stencil on a table
Spread the ink at the top of the stencil using a spoon
Tilt the squeegee at a 45 degree angle, get somebody else to hold and secure the frame, and move the squeegee down the page
Peel the stencil away from the frame
You will be left with your silk screen print!
Outcome

I'm unsure about the outcome; it was hard to cut out the letters the way I wanted them to be because it was all by hand with thin paper. I was unsure about the placing of 'WELCOME TO', I was trying to make the letters all fit into a rectangle, but in hindsight, there's too much space between the words. On the other hand, I like the fact I chose a serifed font, it gives the design a bit of character, opposed to just cutting out bubble writing. I think that the pink ink was a good choice - it fits with Set It Off's current branding, and really packs a punch.
Creating a Tote Bag
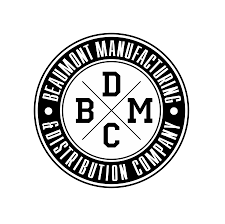
The main aim of this sub project is to put my own silk screen design onto a tote bag as merchandise for my chosen band, Set It Off. I started this process by creating the design for my tote bag on Adobe Illustrator. Firstly, I created my design, and afterwards, I created a mock-up of my design on a tote bag.
I went through a few initial designs (below) before I came to my final design:


Digital Mock Up

Final Digital Design
(to print onto a tote bag)

Overall, I'm pleased with the outcome of my final digital design. It looks clean, and resembles a retro black and white stamp or logo. I was pleased to figure out how to get the 'ELSEWHERE' the right way round. By researching how to alter the positioning of text when using the Type on Path tool, I was able to change the positioning from reversed and upside down to the orientation it is at in my final design. I'm not sure what I would change to improve my design. I didn't want to add anything too complicated because it would spoil the simplicity of the design.
When designing, these were the sorts of logos I had in mind:


https://www.freelancer.com/contest/Old-Fashioned-Logo-Needed-498853-byentry-9404582?w=f&ngsw-bypass=
After I created my design for my tote bag, I put the design on a poster mock up to see what it would look like. I used the band members' colours from the music video of Set It Off's new single, Skeleton.


Final Outcome: Tote Bag
Lastly, I printed my design onto a tote bag. I began by practicing my print on paper. I created a few prints in different colours to experiment with technique and colour mixing. I practiced with black, and mixed my own pink and green from red and white and yellow and blue fabric paint. Initially, I thought black was sleek and would look the most effective as a print. Pink and green are colours featured in Set It Off's branding for their new single, Skeleton. The pink page wasn’t perfect because I accidentally moved the silk screen, but practice is for making mistakes and learning from them!


When it came to printing my tote bag, the first side looked faded due to my technique. I didn't press the squeegee hard enough on the silk screen. However, on the positive side, some friends pointed out that this looked like a stamp effect.

On the second side, with the help and advice from a classmate, I pressed harder with the squeegee and moved the ink around more times than before. My friend kindly held the frame and took photos while I printed. The final result was amazing, and just how I’d imagined it to look!

Reflection
I'm very pleased with the outcome of my tote bag, and even my practice prints! I got some wonderful feedback from my classmates. Some of the kind things they said were:
"It looks like it could be sold in a shop!"
"Professional"
"Like a real logo"
Although the first print didn't go as planned, it looked like a stamp effect, which made an interesting design. On the reverse side, the print looked just as I imagined - it's simple but sleek. It looked like an retro circular logo with the outline and serifed typeface, adding a polished, uniform, and due to the choice of typeface, a modern look, which altogether makes the logo look timeless.


Comments